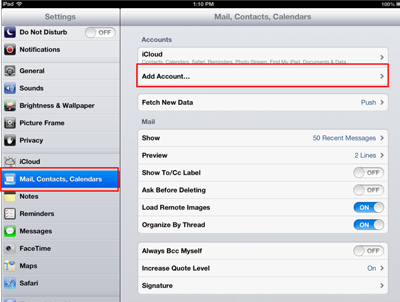
Select Mail, Contacts, Calendars. Tap Add Account…
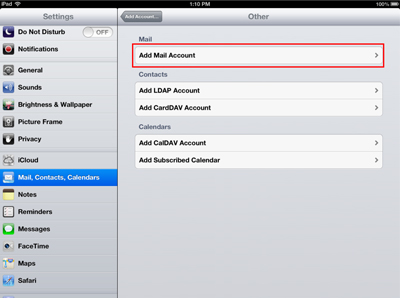
Tap Add Mail Account.
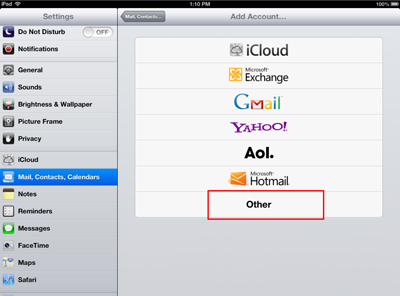
Tap Other.
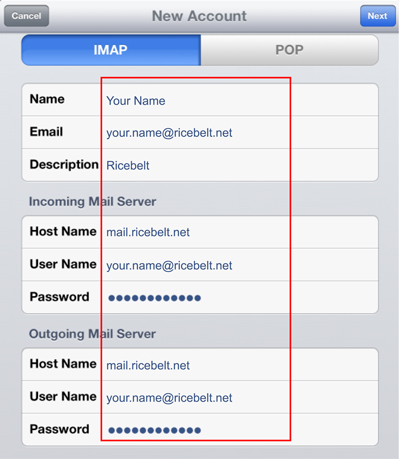
Fill in the Name, Email, and Password Fields; then tap Next.
Tap IMAP. Fill in the incoming and outgoing mail server settings: both are mail.server.net. Nothing is optional even if it tells you it is. Both usernames are your full email address. Tap Next.
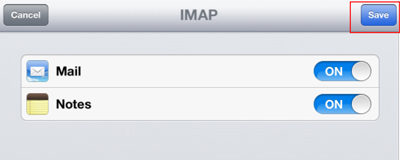
Tap Save.
Tap Done.
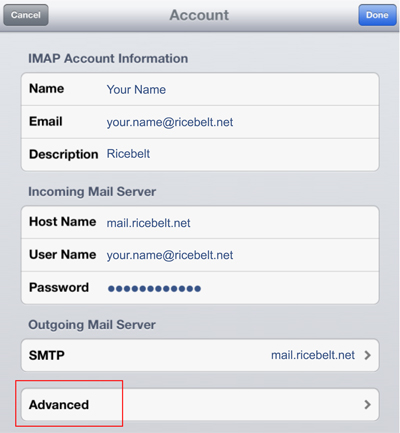
To fix the IMAP folders (so Trash works, etc).
You must open the account in Mail one time, so it will load the folders. Then go back to Mail, Contacts, Calendars settings. Select the Ricebelt account you just created. Tap Advanced.
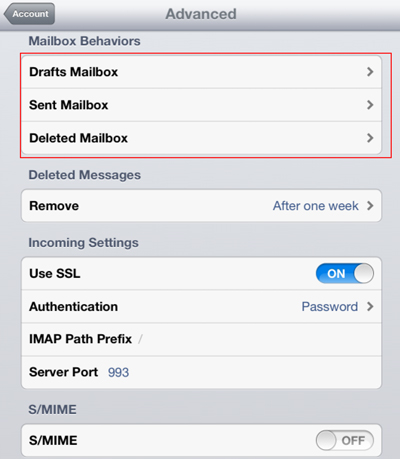
For each of the folders under Mailbox behaviors: Tap the Mailbox, and select the proper folder On the Server.
Here is an example of how the Trash folder should be selected. You should do this for the Sent and Draft folders, too. Notice the checkbox next to the Trash folder.